
Getting started
This tutorial shows the first few steps to create an image gallery with Arles.
Create an image gallery
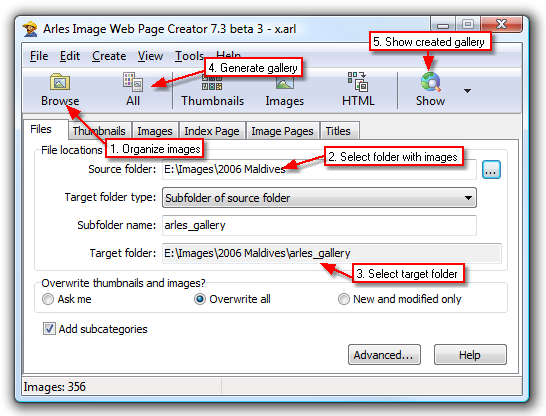
1. Organize your images
Click the Browse button in the main window
toolbar to open the Arles Image Explorer,
a fully integrated image management application. You
can view images, select them (with the checkboxes)
or specify titles (See Adding
Titles Tutorial).
Sorting can be done by dragging and dropping the images with your mouse.
To
rotate images, select them with your
mouse and click the Rotate button on the toolbar.
2. Select folder with images
In the main window select the Source folder where
the original images are stored, for which you want to
create a gallery
(eg
C:\Images\Holiday).
3. Select target folder
The gallery
created by
Arles consists of several HTML and image files.
The Target folder is where all these files will be
saved.
4. Generate gallery
Click the All button on the toolbar to generate the gallery.
5. Show created gallery
Click the Show button on the toolbar to show the generated
gallery in your browser.
Customize your gallery
To change the layout of your gallery, just try any option and click the All and Show buttons again. To get help, press F1 or click the Help button in any window.
For example, to change increase the size of the thumbnails to 120 by 120 pixels:
1. In the main window select
the Thumbnails tab.
2. Set the Width and Height to 120.
3. Recreate your gallery by clicking the All button.
4. Click the Show button to view the gallery.
Publish the gallery to your web server
If you are satisfied with the results, upload the gallery to your web server using the built-in FTP Publish tool.